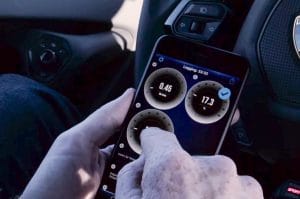
Of course, OBD2 scanners use the same standard that all automotive diagnostic tools do. While this is convenient for professionals, it makes it confusing to people like us. OBD2 scanners can provide a wealth of information, but only if you know how to read the specialized code.
That’s why we have put together this step-by-step walkthrough list of instructions and tips on how to use OBD2 scanners. While each brand may have some unique codes or user interfaces, the base of their functions carry over from product to product. Scroll down for a quick, bullet-point list with a more detailed explanation below.
Short List
Setup
Navigation

Response
 Chris Robson Auto Mechanic
Pro Tip: The difference between an OBD1 and OBD2 scanner has to do with when the vehicle was made. Automotive diagnostic codes weren’t standardized until 1996. All of the different OBD scanners made before the standardized code are considered OBD1 scanners–and there’s a lot of them. All OBD scanners made after 1996 that use the standardized code are OBD2 scanners.
Detailed Description
Setup
1. Update
Despite what it may seem, often the first thing you’ll have to do when you get your OBD2 scanner is to update it. That is because more and more vehicles are getting wireless adapters to make them part of the “Internet of Things.” As the vehicles go, so goes the OBD2 scanner which likely means using a computer and a USB cord to update the OBD2 scanner.
2. Checkup
As soon as your OBD2 scanner is ready for use, you need to run through the various menus and functions to make sure they work. Obviously, you won’t be able to check the diagnostic functions yet, but make sure the basic functions work before use. If something is wrong with the OBD2 scanner’s wiring, it can cause issues with the DLC, or Diagnostic Link Connector, port.
3. Hardline
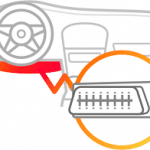
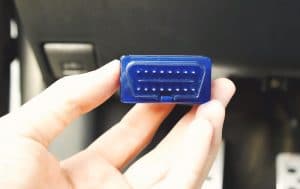
Once your scanner is up to date, you need to connect it to your vehicle. If you are connecting it with a hardline, you’ll need to plug the OBD2 scanner into the vehicle’s DLC. This is usually found near the steering column and should have a 16-pin triangular or trapezoidal female port. Your owner’s manual should have the DLC’s location if you can’t find it.
 Chris Robson Auto Mechanic
Pro Tip: For older vehicles, the DLC might not be in the best of condition. This is because the DLC does not really get used too often except by mechanics. If the car hadn’t had a recent professional checkup, the DLC could’ve gone unused for years. Because the connectors are made of metal, they might have a bit of surface rust. Do not attempt to clean the DLC. Instead, gently wiggle the plug until the display screen shows
4. Wireless
If your OBD2 scanner can connect wirelessly, this is when you would connect to your vehicle. This generally involves using a Bluetooth connection even though some newer vehicles have onboard WiFi. This is because the accessory markets always lag behind the main product. As such, few OBD2 scanners can connect via WiFi, but there are plenty of scanners that have Bluetooth protocols.
5. Ingnition
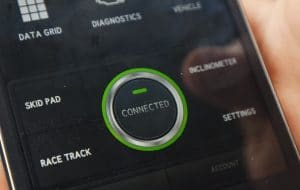
Once the OBD2 scanner is connected to the vehicle, put the key in the ignition. Turn the key until the ignition comes on, but do not start the engine. At this point, the OBD2 scanner should provide some indication that it has connected to your vehicle. After the OBD2 scanner makes a connection with your vehicle, you may be prompted to put in your VIN or Vehicle Identification Number. This depends on the OBD2 scanner and is often used for code cross-referencing by higher-end models.
Navigation
1. Menus
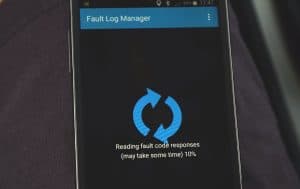
Once the OBD2 scanner has finished its diagnostic scan, you will then need to find where in the menu the scanner displays the various found codes. This is part of why you made sure the other functions worked before connecting the scanner earlier. The menus will differ from scanner to scanner, but they usually designate the codes with 2 levels or degrees. The more serious codes will keep your Check Engine light on even after you reset it. The less serious codes mean the sensor has failed before but not consistently enough to say it is broken.
2. Codes
This is the meat and potatoes of an OBD2 scanner, the reason you got one. Of course, like any code, it doesn’t do you any good without the cipher or key. This is an area that once required the most labor on your end, but newer models either come equipped with an onboard database or more often can connect to a smart device. If connected, the OBD2 scanner will generally tell you what the various codes are and may even provide a diagnostic map to see where on the vehicle the sensor is located.
3. Codes List
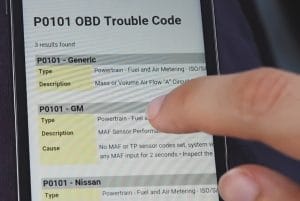
Of course, if you have an older or less expensive model OBD2 scanner, there’s a good chance you will have to look the codes up yourself. Thankfully, the system is not actually that difficult. The first digit is a letter that tells you the system the problem is in. The second digit is used to identify the specific manufacturer or generic model. If the second digit is a 0, 2, or 3, the code applies to all vehicles. If the second digit is a 1, then it only applies to some vehicles. The middle digit tells you what subsystem the problem is in while the last 2 numbers refer to the specific sensor.
 Chris Robson Auto Mechanic
Pro Tip: There are plenty of websites on the Internet that provide OBD code lookups. Once you get the code from your scanner, put it in the search bar on one of these websites. If you put the code in properly, you should be given the exact entry as in your owner’s manual. That said, you can always use the owner’s manual which will at least include the custom OBD codes specific to your make and model if nothing else.
Response
1. Diagnosis
This is one of the areas where having a newer and higher-end model can really come in handy. Basically, figuring out what to do with the information is made a great deal easier if the information is easy to access. Specifically, because the codes don’t actually tell you everything, making sure you have them all available in one place can help diagnosing the actual problem.
 Chris Robson Auto Mechanic
Pro Tip: Newer models, especially those that work with computers or smart devices can often provide a wealth of information to a 3rd party device. Basically, the OBD2 scanner keeps track of a lot more information than it can display. However, if you can connect the scanner to other devices, it may be able to use their display.
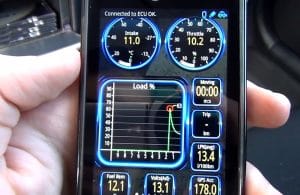
More and more OBD2 scanners are also adding smart device compatibility to work with apps. For the most impressive of these, the apps can provide “real time” information to give you a clearer picture of what is actually going on.
2. Prognosis
Once you’ve figured out which sensors are failing and the degree to which they’ve failed, now’s when you have to put it all together. Of course, if you’re not a professional mechanic, there’s a good chance you need a professional to assist you. A big part of this is because different problems can all trigger the same sensors. Figuring out what the problem is by cross-referencing the “symptoms” often requires specialized knowledge or experience.
3. Reset
Whatever codes you get and need to do, it’s important to remember that the “Check Engine” light is not just for specific problems. Sure, the light will go off if something major happens, but it’ll also go off after enough time has passed. In this way, the light is also meant to remind you to do a bit deeper general maintenance. How long before the light turns on regardless the condition of the vehicle will differ from brand to brand. Once you’ve run the diagnostic and fixed the issue, you need to reset the light to know when to scan it again.
Conclusion
Of course, understanding what the codes mean and how they match up in the world are two very different things. While figuring out the code system is confusing enough, many problems will trigger the same codes.
This list is a good overview, but if you are not an ASE Certified Master Technician with the L1 Advanced Engine Performance Diagnostic certification, leave any real problems to the professionals. Use caution with an OBD2 scanner. We hope you enjoyed the list and better understand how to use your OBD2 scanner. Please leave any thoughts or comments below and remember to share with friends and family that might want to do some routine maintenance on their own vehicles too.
Leave a Reply