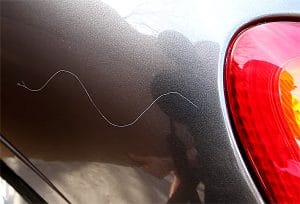
Fortunately, there are a number of affordable steps you can take to effectively eradicate scratches from the surface of your vehicle. Read along helpful tips and tricks on how to remove scratches small and large.
What You’ll Need to Follow This Tutorial
- Whitening Toothpaste
- Microfiber Cloth
- Hose
- Water
- Car Washing Fluid
- Scratch Removal Solution
- Fine and Coarse Sand Papers
- Automotive Primer
- Scotch Tape
- Automotive Paint
- Automotive Wax
- Buffing Pad
- Cerium Oxide Paste
- Plastic Restoring Gel
How to Remove Small Scratches From a Car
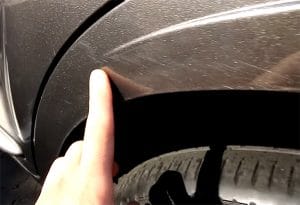
A cluster of minor scratches is a dismal sight for any car owner.
Since minor scratches are seemingly inevitable and vehicle paint jobs are needlessly pricey, many car owners look for affordable D.I.Y. solutions to this common issue.
Read along simple step-by-step instructions on how to eradicate minor scratches from the surface of your vehicle.
1. Assess the Damage Identify and mark off any scratches on your vehicle. Run your finger over each scratch to try and identify its depth. If the scratches are on the surface, your fingers will scan over them without snagging.
2. Wash the Scratch Use car washing fluid and water to lather the surface of your vehicle. It’s important to remove any dirt or grime before moving on to the next step. When you’re finished cleaning your vehicle, use a towel to thoroughly dry the surface.
3. Apply Buffing Paste Apply toothpaste or commercial buffing paste to a small microfiber cloth. Be sure to use a nonabrasive cloth to avoid risking further damage to the surface of your vehicle.
4. Buff the Scratch Rub the buffing paste into the scratch using small circular swipes. Use pressure to work the paste into the surface. Do not apply more than two coats of buffing paste, as it has the potential to wear away your paint.
How to Remove Large Scratches From a Car
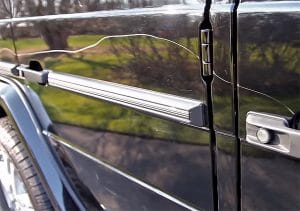
Large scratches are easy to notice and, as such, dramatically detract from a vehicle’s aesthetics. When left alone, deep scratches are likely to rust. As such, we recommend that you act quickly to restore any deep scratches on the surface of your vehicle.
1. Inspect the Scratch
Deep scratches require a bit more finesse. Inspect the scratch closely. If the paint has been penetrated, it will need to be sanded down and touched up.
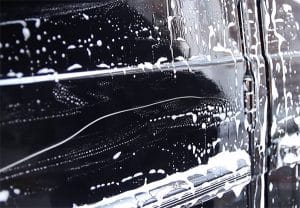
Dampen your vehicle by spraying it with a hose. Use a nonabrasive car washing fluid to remove any stuck-on dirt and grime. Then, use a towel to try the surface of the vehicle.
3. Apply Buffing Paste
Try using a scratch removal paste to buff the surface. If the buffing paste does not produce satisfactory results, move along to the next step.
4. Tape Off the Damaged Area
Use masking tape to create a border around the scratch. Then, use thin plastic painting drapes to cover the undamaged areas that surround the scratch.
5. Sand
Use a fine-grained sandpaper block to remove any rust and debris. Use a chemical solvent to ensure that the surface is properly cleaned, and no loose bits remain.
6. Apply Automotive Primer
Apply spray primer to the area. Use a color that is close to the color of your vehicle. Hold the spray paint can 12 inches away from the surface of your vehicle. This will help you to avoid over-saturating the area with paint. Allow the paint to dry completely before continuing on to the next step.
7. Apply Touch-Up Paint Pen
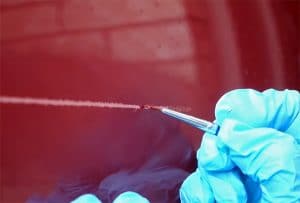
Use a touch-up paint pen or small paintbrush to apply a thin coat of paint to the surface of the scratch. Allow the paint to dry thoroughly. For better results, apply two or three coats of touch-up paint.
8. Apply a Clear Coat
Apply a small amount of clear coating to the surface of the freshly painted scratch. Allow the clear coat to spread a bit beyond the perimeter of the actual scratch.
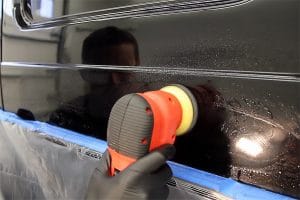
Use a fine-grained sanding pen to smooth out the surface of the clear coating. The paint should be consistently level on the surface of the vehicle. First, use a wet sandpaper to gently buff the surface. Then, use the 1,500-grit dry sandpaper to further smooth the surface. Never sand in a circular motion, as this will leave behind noticeable scuffs.
10. Buff the Scratch
Use a clean microfiber cloth to buff the surface of the scratch. If the repair process had worked well, it should seamlessly blend into the rest of the car’s exterior.
How to Remove Scratches From a Plastic Car Exterior
Many modern vehicles boast plastic exterior panels. Believe it or not, you can easily remove scratches from plastic on your own. Follow these step-by-step instructions to save money and eradicate ugly scratches from the surface of your vehicle.
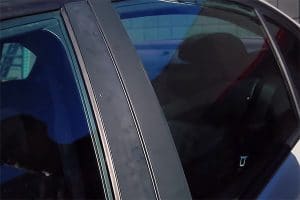
1. Assess the Scratch
Take the time to properly assess any scratches on your vehicle.
2. Clean the Area
Use water and a car washing solution to carefully clean the surface of the scratch. Use pressure to remove any stubborn dirt that has accumulated in the rough edges of the scratch. When you’re happy with your cleaning job, use a dry towel to thoroughly dry the surface.
3. Buff the Scratch
Use a commercial buffing solution and buffer to even out the surface of the plastic car panel. We recommend using a small buffing pad attachment and handheld Dremel or power drill.
4. Clean the Scratch
Use a little soap and water to clean the surface of the scratch. The, use a towel to dry the surface.
5. Apply a Clear Coat
Plastic car panels retain their color the whole way through. There’s no need to apply any touch-up paint or primer. Use a clear coat of paint to add sheen to the surface of the newly restored area. If necessary, use masking tape to create a restrictive perimeter around the area before applying paint.
6. Dig Deeper
If the scratch is well below the surface, you may need to take additional steps to restore the area. Run your fingernail over the scratch to determine its depth. If your fingernail snags, follow the steps below to restore.
7. Apply Touch-Up Paint
After cleaning and buffing the scratch, use a color-matched touch-up paint to fill in and level the scratch on your vehicle.
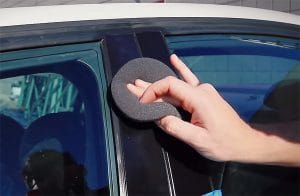
Use a fine-grained sandpaper block or pen to smooth out the paint after it has dried. Do your best to level the surface of the paint so that it is indistinguishable from the rest of the vehicle`s body.
9. Apply a Clear Coat
Once again, always apply a clear coat to seal in your progress. Once the clear has dried, use a microfiber cloth to gently brush the surface.
10. Apply Wax
Use automotive wax to buff the surface of the newly repaired area.
How to Remove Scratches From the Car Glass
There’s no part of the exterior of a vehicle that is impervious to scratches. As such, most vehicles accumulate a few scratches in the glass windows or windshields. Use the following instructions to remove small scratches in vehicle glass.
1. Clean Your Vehicle Glass
Use a hose and soap to gently remove any dust and debris from the exterior of your windows. Then use a window washing spray and lint-free cloths to clean the interior and exterior surface. Allow the glass to dry.
2. Inspect the Scratches
Carefully inspect the scratches in your vehicle glass. Use your fingernail to determine the depth of the scratch. While small surface nicks can be resolved, deep gauges may indicate a need for total glass replacement.
Keep in mind that many states require comprehensive glass insurance coverage, enabling drivers to replace damaged vehicle glass for low or no out-of-pocket cost.
3. Apply Cerium Oxide Paste
Cerium oxide paste is the main ingredient in commercial buffing pastes. Apply a small amount of the paste to the scratched area. It’s also the main ingredient in glass-topped oven cleaners. Use a nonabrasive cloth to gently remove the paste from the scratch.
4. Clean the Surface
Use a clean dry nonabrasive cloth to buff the surface of the area and remove any remaining residue. Then, use the hose to lather the window with water.
5. Cleanse with Glass Cleaner
Use glass cleaner to strip any residue from the surface of the glass. Be sure to use a lint-free cloth.
6. Reapply
Don’t toss your cleaning supplies. Unfortunately, glass scratches have a way of reappearing over the course of time. Repeat the process once or twice a year to keep your windows crystal clear and scratch-free.
How to Remove Scratches From a Black Car
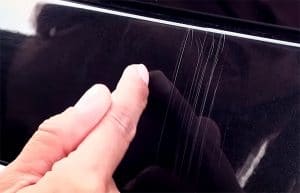
Many vehicle owners don’t realize that the majority of the scratches on their black cars are due to poor washing habits.
Always rinse your vehicle off before scrubbing it down. Small particles often cause scratches when carelessly ground into the surface of a vehicle. What’s more, rinse your dirty sponge in a separate bucket of water.
1. Assess the Damage
Take a close look at the scratches on your vehicle. Run your fingers over the surface of the scratches to ensure that they are shallow.
2. Clean the Surface
Use water and car washing fluid to properly clean the surface of your vehicle. Remember, dust and debris are often trapped within the scratch. Don’t be afraid to apply a bit of pressure.
3. Use the Paste
Apply a scratch removing paste to the surface of the scratch. Use a microfiber cloth to buff it away. If you don’t have a commercial scratch paste on hand, consider using toothpaste to buff the surface. It’s best to use whitening toothpaste and a microfiber cloth to complete the job.
4. Wax
Invest in a high-quality automotive wax. We recommend using something like Turtle Wax T-3KT or Meguiar’s G6207 Black Wax Paste. These premium products are specifically designed for vehicles with black paint. Use a nonabrasive applicator pad to swirl the wax onto the surface of your vehicle. Let it settle and dry a bit. Then, use a nonabrasive cloth to buff the surface of the vehicle and remove any remaining residue.
How to Remove Scratches From a Car Bumper
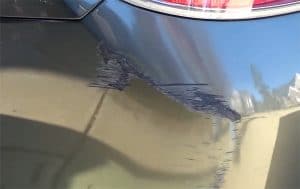
Car bumpers are an inevitable hot spot for scratches. So, how does one stay on top of the damage? We’ve got all the tips and tricks you’ll ever need to keep your vehicle looking good as new. Read along for detailed instructions for caring with a scratched bumper.
1. Access the Damage
Most modern vehicles have removable bumper panels. It’s not uncommon for these to be made of plastic or fiberglass. Oftentimes, you will need to completely remove a bumper in order to fill in any dings and scratches or pop out any dents.
2. Mask of the Damaged Area
If you are not planning on removing your bumper to work on it, take the time to mask of the area with masking or painting tape.
3. Sand Down the scratches
Use medium-grit sandpaper to sand down the surface of the damaged area. Keep in mind hat bumper scratches often consist of several horizontal scratches that make up a large patch. If this is the case, you’ll need to take a significant amount of time to sand down the surface.
4. Clean the Sanded Area
Use soap and water to remove any sediment from the sanded area. Allow it to dry thoroughly before moving on to the next step.
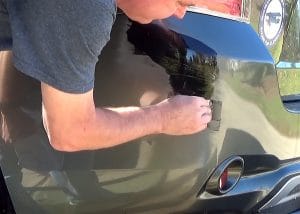
If your bumper has indents or grooves, now is the time to even out the surface. Scuff the area with a piece of sandpaper.
6. Apply Filler
Consult your vehicle manual or local car dealer to figure out what type of plastic your bumper is made of. Then purchase a matching adhesive filler.
Mix the adhesive with hardener, making sure to blend it thoroughly. You will need to work quickly. Use a plastic scraper to apply a thick coat of the adhesive to the area you wish to restore.
7. Sand the Adhesive
Allow the adhesive to dry for about 20 minutes. Then, use 80-grit sandpaper to sand down the surface. If there are any noticeable blemishes, apply an additional coat of filler. Then, use 120-grit sandpaper to buff the surface of the blemish. After that, you’ll want to use wet fine-grained sandpaper to smooth out and buff the surface.
8. Prep the Surface For Painting
You need to prime the area before applying a base coat of paint. Primer with help prep the surface. A good primer will prevent the paint from peeling off. Use at least two coats of spray primer. Use fine-grained sandpaper to buff the primer to remove any imperfections.
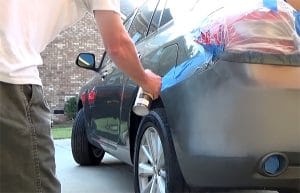
Apply a matching basecoat. You may need to apply multiple coats in order to expertly match the color. Allow each coat to dry thoroughly before applying the next.
10. Apply a Clear Coat
Apply a clear coat of paint to seal in your basecoat. Be sure to stand at a distance when applying the paint. This final layer of sheen will help the repair to seamlessly blend into the surrounding areas. Keep in mind that you may need to apply two or three coats.
How to Remove Key Marks For a Car
One of the most common sources of surface scratches are keys. In fact, most vehicles have quite a few key marks around the keyholes on the doors and trunk. These scratches are unsightly and annoying. We recommend using a scratch repair solution to buff out any surface scratches. While you’ll probably need to repeat this process a few times a year, you’ll notice an amazing improvement in your car’s overall aesthetics.
Inexpensive and Effective Scratch Repair Solutions
The best part is that these solutions are extremely inexpensive. A standard-sized container of Formula 1 Scratch out Paste or Turtlewax Scratch Repair Renew can be purchased for around $15. Each bottle contains enough solution for multiple applications. Keep in mind that you do not want to over apply scratch repair pastes, as they can wear away at your vehicle’s paint.
Toothpaste – Best Alternative
Alternatively, you can use toothpaste to buff out the scratches. Most kinds of toothpaste contain mild abrasives that help remove the damaged layer of clear coating on your vehicle. It also happens to smell good. Not to mention, it will save you a trip to an automotive supply store. We recommend using a mildly abrasive whitening toothpaste to complete the job. Use a nonabrasive microfiber or terry cloth to buff your vehicle. When you are done buffing the vehicle, wax the surface to create a polished finished look.
Final Thoughts
We hope you enjoyed these helpful tutorials on how to remove scratches from a vehicle! While scratches are common occurrences, they don’t need to be ignored. If you fix a scratch let us know how it goes in the comments and if you liked these instructions share the advice with your friends!



Leave a Reply