What You Need to Follow This Tutorial
Below, you’ll find a list of items you may need to stop the spread of vehicular rust.
- Flashlight
- Razor
- Fine-Grained Sandpaper
- Masking Tape
- Protective Goggles
- Gloves
- Automobile Primer
- Touch-Up Paint
- Car Wash Detergent
- Soft Sponge
- Bucket
- Automobile Wax
- Hose
- Rust Inhibitor
- Clear Primer
- Microfiber clothes
- Grease and wax remover
- Poly sheeting
- Scissors
- Fiberglass filler and hardener
- Self-adhesive body patch
Step-by-Step Instructions
Wondering what to do and where to start? We’ve brought you step-by-step instructions on dealing with minor and major rust issues. We have also added a detailed section on common rust issues and preventative care.
Keep in mind that most automotive rust can be repaired at home with just a few simple tools. Of course, it’s important that you always take your time when repairing a vehicle. Your patience will be well worth it when you see the end result.
Step 1: Inspect the Vehicle
Check out Mercedessource’s rust inspection tips in this informative video.
Begin by thoroughly inspecting your vehicle for rust. Use a flashlight to illuminate the underside of your vehicle. Check for rust patches along the entire perimeter of the vehicle. Work your way around the vehicle, checking thoroughly from the bottom to the top.
Open the doors to check the frame rails that hide underneath the doors. Then, check along the wheels, making sure to inspect under the lips. After that, take a close look at the exhaust components. These are all major hotspots for oxidation.
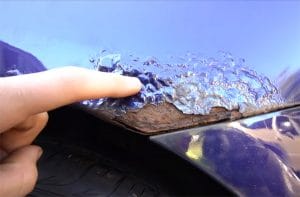
Bubbled, or blistered, paint is also an early sign that rust is developing.
Meanwhile, more advanced rust is reddish-brown in color and flaky in texture. It’s important that you take note of and treat rust at all stages. After all, it is extremely destructive, fast-moving, and irreversible.
Step 2: Repairing Minor Rust
Do you have a small rust spot on your vehicle? Is the rust mostly on the surface? If so, use the following mini guide to remove the minor rust and touch-up the area. If your rust spot is large and in charge, skip ahead to the section below.
While you’re at it, check out Rachel Ray’s minor rust prevention tips.
If you’ve identified a minor rust spot, you’ll need to repair it as soon as possible. Follow these rust repair guidelines to eradicate minor rust.
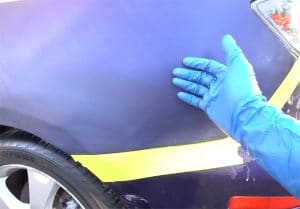
1. Mask off the Area Use masking or painting tape to create a closed border around the rusty area. This will help you to focus your attention and protect the surrounding surfaces while you work.
At this point, you’ll also want to protect yourself too. Put on protective goggles, a face mask, and work gloves. The next few steps have potential to be messy. As such, it’s important to protect yourself.
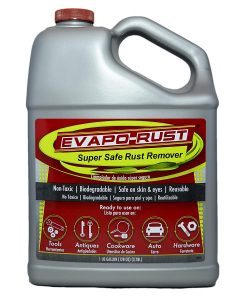
2. Remove the Rust Use a razor blade to carefully scrape off any large flakes of rust. You may also opt to use a rust removal fluid to remove stubborn rust to return the metal to its original state.
Evapo-Rust The Original Super Safe Rust Remover, Water-Based, Non-Toxic, Biodegradable, 1 Gallon
Check Price
3.Sand the Area Use fine-grained sandpaper to remove any remaining rust. We recommend that you use 40-grit sandpaper to remove any fine bits. Do this until you expose a clean layer of bare metal.
After your initial sanding, switch to 120-grit sandpaper. Feather the edges of the repair area to create a more fluid connection between the paint and metal.
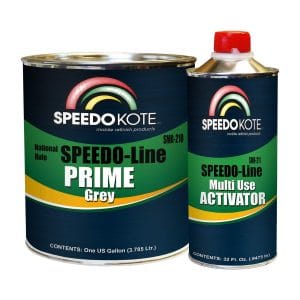
4. Prime the Area Apply a thin layer of automotive primer to the area that you have just prepped. Primer helps paint adhere to bare metal. It may also be used to fill in scratches and gaps caused by the removal of rust. Most importantly, it helps prevent the future development of rust.
Allow the primer to dry. Then, apply a second coat.After this, you may wish to apply additional coats. Do so as you see fit. Allow the primer to dry completely between applications.
Speedokote SMR-210/211 – Automotive High Build 2K Urethane Primer Gray Gallon Kit, Fast Dry, Easy Sanding, Activator is included
Check Price
5. Apply Touch-Up Paint Use a touch-up marker or small paintbrush to apply a thin layer of matching paint to the area your are repairing.
- Painting Tip #1: Always allow the paint to dry between each coat. This will allow it properly adhere to the surface and cure. Otherwise, you may find yourself redoing the entire job!
- Painting Tip #2: Take a piece of paper and roll it into a tube. Place it on the border of the area you are touching up. Use it to control the application of spray paint. It will help feather the edges of the paint, making for softer and more manageable blending.
- Painting Tip #3: Hold the spray paint away from the vehicle. A distance of 1 foot is ideal for creating a smooth, even finish. If you spray too close, you risk developing a drippy, thick surface coat.
6. Repeat the process You will need to apply multiple coats of touch-up paint in order to restore the look of your vehicle. Always allow the paint to dry between applications.
7. Apply a Clear Coat Don’t forget to apply a coat of clear lacquer. Spray the clear coat from a distance. Allow it to dry thoroughly. Then, reapply. We recommend using multiple coats of clear lacquer to create a seamless connection between the repair and the rest of the vehicle.
8. Buff the Repair Once the final clear coat is dry, use a microfiber cloth to buff the repair. This will help remove any excess debris and set the paint. Wait a month or so before applying wax.
The repair should be uniform with the rest of the vehicle.
Step 3: Repairing Major Rust
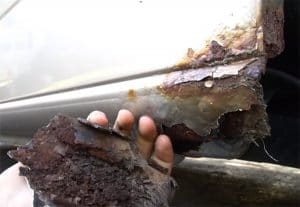
1. Tape Off the Perimeter Use masking or painting tape to create a perimeter around the rust. Since you are removing a large amount of dust, you’ll also want to use a plastic bag or tarp to protect the surrounding areas of your car.
2. Put on Safety Gear Put on your safety goggles and work gloves. Rust removal creates a fine metal dust that can irritate or even injure you. It’s also a wise idea to throw on an industrial respirator to prevent yourself from inhaling any metal or paint particles.
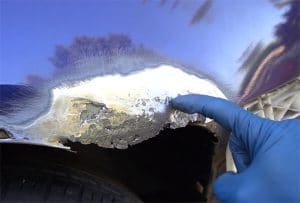
4. Sand the Surface Use a fine-grained sanding block to remove any remaining rust. When you are done, the surface should be shiny, smooth bare metal.
Make sure to remove every last bit of rust! Any rust left behind will spread.
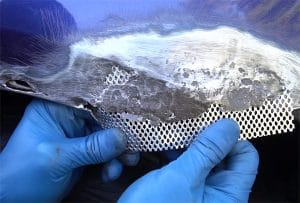
5. Patch the Holes Major rust damage typically leaves behind a few gaping holes. Place a self-adhesive body patch behind the hole. You’ll use it to add fiberglass strand filler.
6. Prep the Weakened Sheet Metal Use a small hammer to dent the bare metal in the damaged area. This will help the fiberglass strand filler to properly adhere to the surface.
7. Sand the Reverse Side If the rust is along the wheel well or base of your car, be sure to check the reverse side for rust. It’s important to remember that major rust penetrates past the surface. Any rust left behind has the potential to spread and cause even more damage.
8. Coat with Rubberized Coating Coat the reverse side with a rubberized coating. This will help protect the metal without requiring a coat of paint.
9. Remove your self-adhesive body patch from the packaging. It should be made from a stainless steel mesh material. Place it in front of the damaged area to determine the size you will need. Use household scissors to trim the patch until it is a precise fit for the damaged area.
10. Prep Your Fiberglass Filler Most fiberglass fillers come with a filler and hardener. Use an old plastic container with a flat bottom to mix the two together. Use a plastic scraper to blend the hardener and filler together. Make sure that all of the ingredients are mixed together and that there is no streaking in the filler.
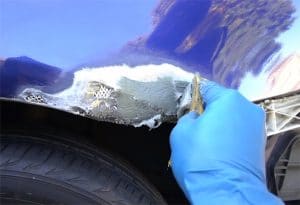
Don’t worry if the filler isn’t perfectly smooth. Your goal is simply to coat the hole and create a new surface to work with.
12. Allow It to Cure Follow the direction on your fiberglass filler. Allow it to cure.
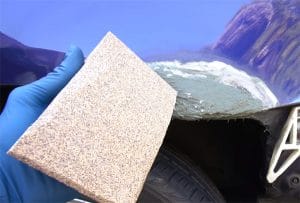
It’s worth noting that the slightest imperfections are even more noticeable with a coat of paint. So, take your time and make sure everything is perfectly smooth.
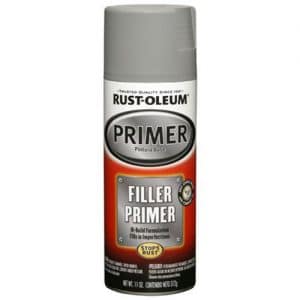
14. Spray with Filler Primer While it can be tempting to use regular automotive primer, spray filler primer is your best bet. After the paint dries, use a sanding block to, once again, smooth out the surface.
Rust-Oleum Automotive 11-Ounce Filler Primer Spray Paint, Gray
Check Price
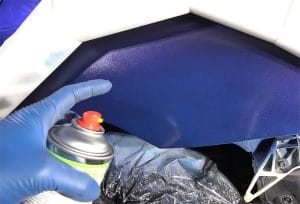
16. Apply a Clear Coat Apply a coat of clear lacquer to seal the paint. This will help the area to obtain a sheen that is uniform with the rest of your car.
Clean the area with soap and water. Step back and take a look at your progress. While repairing major rust takes a bit of elbow grease, it’s well worth the effort. Your car will look better than ever, and the preexisting rust will no longer be a threat.
Step 4: Total Replacement
Some rust is beyond the point of a regular repair. If the rust on your vehicle has eaten away a major element and made it virtually unusable, it may be time for a complete part replacement.
Step 5: Take Preventative Measures
Take the following precautions in order to prevent the development of vehicular rust.
1. Wash Your Car Regularly:
Establish a regular car washing schedule. You may wish to stock up on car wash essentials so that you can complete the task at home. Otherwise, it’s best to visit an automated car wash center near you.
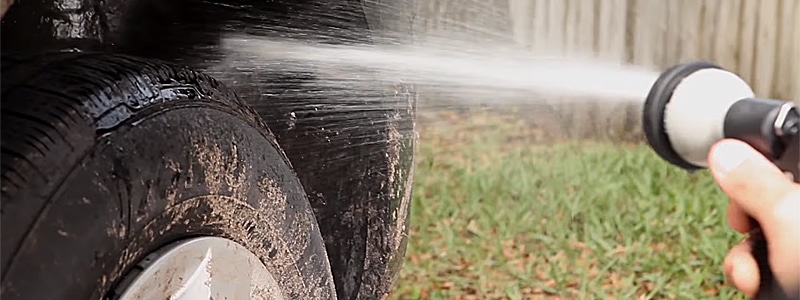
If you’re washing the car yourself, utilize a soft sponge and car wash detergent to lather the entire exterior of your vehicle. Don’t be afraid to use a little elbow grease to remove stubborn dirt and grime. When you are finished lathering your vehicle, use a hose to rinse off the remaining mixture. Finally, use a dry towel to remove any remaining liquid.
2. Wax Your Vehicle:
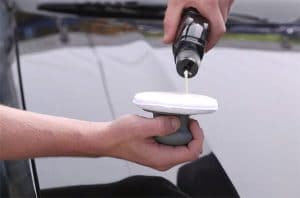
Use a non-abrasive cloth to spread a thin even layer of the wax over the entire surface of your vehicle. Not only will the wax improve the sheen of your vehicle, but it will stop rust in its tracks.
Meguiar’s Ultimate Liquid Wax
Check Price
Step 6: Monitor the Situation
If you’ve already taken the steps to eradicate rust on your vehicle, you’re probably looking to avoid a repeat adventure. Read along to learn about what causes cars to rust.
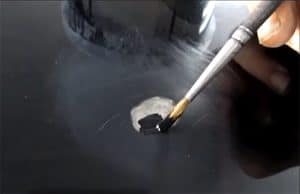
Salt If you live near the ocean, you may notice that your car is rusting at a rapid rate. High humidity and salt are a troubling twosome when it comes to metal. If this is the case, you’re probably wondering what you can do to protect your car from the brown plague that’s spreading across it.
To better protect your car, take the following steps:
1. Identify and Scrapes or Nicks Even the most cared for cars have small scrapes and nicks. However, it’s important to identify and repair these problem spots before rust can get to them. Rust preys on exposed metal. A small nick is like a gaping wood waiting for bacteria. Use a small piece of sandpaper to smooth the surface of the scrape, apply a coat of primer, and touch it up with automotive paint and sealant.
Check for scrapes regularly. Wheel wells, undercarriages, doors, and trunks are all hot spots for rust.
2. Deep Clean Invest in a professional undercarriage and all-around cleaning. Industrial cleaning tools use high pressure to eradicate stubborn salt and grime. Wash your car regularly, including the winter.
3. Apply a Rust-Proofing Liquid You can purchase a liquid or spray rust proofer at your local automotive store. Apply the fluid to the surface of your vehicle using the method detailed in the instructions.
BOESHIELD T-9 Rust & Corrosion Protection/Inhibitor and Waterproof Lubrication
Check Price
Do not apply the rust-proofing liquid to any of the plastic components on your vehicle. This can damage them or even cause a fire, as rust proofer is extremely flammable.
Breeding Grounds and Warning Signs
I’m often the first one to admit that I can be a little obsessive about rust. In my defense, I spend thousands of dollars to keep your vehicle in good condition. As such, I am not about to let a little bit of metal corrosion rob me of my hard-earned investment.
I’ve taken the time to point out some of the areas that rust typically targets. I recommend you use special care when inspecting and caring for these elements of your vehicle.
- Dark Spots Do you have a mysterious dark spot on your vehicle? Oftentimes, this is a sign that rust is developing under the surface. It’s important to remember that rust can, in fact, develop on the underside of your vehicle.
- Dimples in the Paint Pitted paint is a breeding ground for dirt and grime. Treat these areas with rust proofer. If the blemish is aesthetically displeasing, consider sanding down the surface and filling in the pit with a bit of fiberglass filler.
- Metal or Chrome Some vehicles have exposed metal parts. Treat these areas with liquid rust proofer. Take care to inspect them on a regular basis.
- Rust Bubbles Some mechanics recommend that you apply a bit of PB Blaster to rust bubbles. The mechanic uses a syringe to inject rust bubbles with the solvent. This is a preventative step that will help you stop rust in its tracks. While you’ll need to eventually take care of the rust, injecting the bubbles with a solvent will give you enough time to save for the repair.
Final Thoughts
Let us know what you thought about the article. If you try it then drop us a line in the comments below. If you like what you read, share it with a friend. Together, we can put rust behind us!
Leave a Reply